
While installing marble tile isn’t the single most difficult task in the realm of Do-It-Yourself home repair, it can still be a tricky process that requires precise planning and intricate implementation. This type of installation can be quite an undertaking, with large rooms requiring two or more days to complete with another three or four days for drying. However, by breaking down the task into some easy-to-follow steps, you can install marble tiles and add a stunning enhancement to almost any room.
Marble flooring tiles can be used in any home area but are especially popular in the kitchen, bathroom, laundry room, and even as decorative accents for walls and showers. For example, installing marble flooring can add beauty and elegance to a bathroom or foyer. With a variety of options in colouring and finish, marble tiles can complement virtually any colour scheme. Installing marble floor tiles is not an easy process but can be done yourself if you are careful and patient.
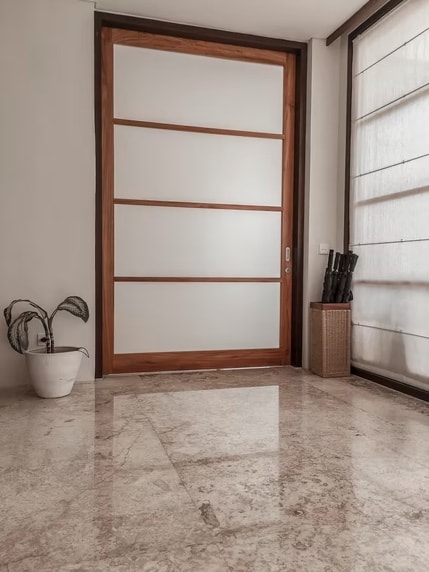
Beautiful marble flooring started its journey into our homes as limestone. Millions of years of metamorphosis—intense heat and pressure—produced a dense variegated stone that can be polished to a high shine. Marble is now mined worldwide and is highly prized as a natural product for countertops and flooring. Polished marble reflects light to make rooms seem more spacious while offering a touch of elegance.
Yet for such an upscale material, marble is also durable and easy-care. As a result, you’ll find it often installed in “wet” environments, such as kitchens and bathrooms, where frequent water splashes can be simply wiped away without causing damage. So if you’re thinking about incorporating this fabulous flooring into your home design, read on to learn what types of marble are available, how to choose the best one for your budget, and glean some DIY tips should you opt to tackle installation yourself.

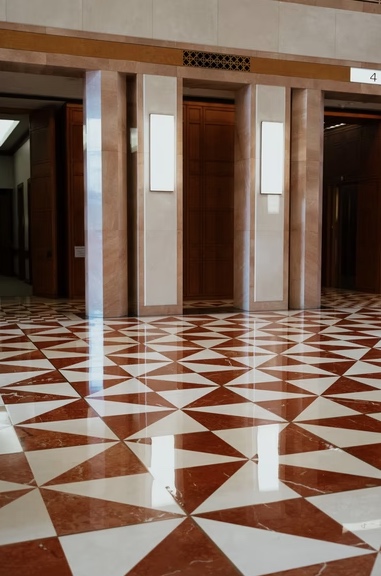
Marble comes in a great variety of colours and different surface finishes, so you are faced with a great choice. There are two most popular options for marble floor tiles – polished and tumbled or honed. Sometimes polished marble is even referred to as traditional marble as the shiny, glossy finish is usually associated with the look of this stone. So, if you decide to opt for polished floor tiles, you’d better use them in a smaller space such as a foyer or an entryway. They will look quite impressive and add light to the area, especially if you choose lighter colours.
Tumbled marble tiles usually come in earthy natural nuances like beige, milky or grey. The finish gives them a kind of rustic appearance. Since such tiles usually come in larger sizes, they are more suited for bigger kitchens, dining areas or living rooms.
Choices for Marble Flooring
There are two common choices for your marble tile flooring: traditional and tumbled. Traditional marble flooring tiles have a polished, shiny finish that adds class to your design. They look impressive on an entryway or foyer. Tumbled marble flooring comes in beige and milky tones. They are buffed to have an earthy and natural-looking finish. They come in larger sizes and work well in large areas, such as kitchen/dining room combinations.
Prepare the substrate
“The substrate should be as smooth as possible before laying tiles.”
Next, you’ll want to install an anti-fracture membrane or another type of vapour barrier underlayment. Using a notched trowel, spread thin-set mortar directly on a plywood subfloor and fasten the anti-fracture membrane with 1.25-inch screws. These steps help decrease any space between the two surfaces that can lead to water seepage or cracks in the tiling, thereby damaging the overall integrity of the area. The substrate is the foundational base that you will cover with marble tile. Remove any excess dirt with a nylon or iron brush, straighten out all the uneven areas and fill any cracks. You want the substrate to be as smooth and clean as possible before attaching the tiles.
Once the surface is as clean and smooth as you can get it, you will need to identify the appropriate starting point with guidelines to assist in a straight and symmetrical layout. You want to install the tiles from the centre point of the room to radiate outward instead of abruptly going from one wall to the next. Find the midway point of two opposite walls, draw a chalk line to connect them, measure the centre of that line, and use a T-square to make an intersecting chalk path to the other two opposite walls. Doing this will indicate the centre of the room while also dividing it into four neat quadrants.
Prepare the mortar
Each manufacturer has specific instructions for mixing their mortar, so be sure to closely adhere to those rules. There’s no need to mix all the mortar immediately, so only make a small amount and then continue making more as you need it.
It is best to use thin-set mortar for your marble tiles. First, mix it according to the instructions. Prepare a small quantity first so that it won’t dry. Then, use a notched trowel to spread enough mortar so that you can lay one tile.
Time to bust out the trowel. For marble tiles 12″ square or smaller, a ¼” notched trowel is suitable. However, for larger tiles and irregular tumbled or natural cleft materials, you’ll need to use a ½” notched trowel to create larger, deeper grooves in the adhesive. Starting from one of the corners of the intersecting chalk lines, apply a layer of mortar with the flat side of the V-notched trowel, creating grooves in the mortar as you go. Remember, because the adhesives dry so quickly, it’s wise to only cover a small area of the substrate at a time and immediately attach the tiles before moving on and adding more.
Step-by-step Guide How To Lay Marble Floor Tiles
Prepare for the installation.
Make sure that you wear comfortable, not baggy clothes, that are suitable for work. Get yourself gloves, mask and goggles that will protect you during the different steps of the process. In addition, wear gloves, eye protection and a facemask. These will protect your hands, eyes and lungs as you install your marble tiles.
Remove any existing tiles. If you are installing the marble on a floor already tiled, you must remove the old tiles first.
- Ceramic tiles can be smashed with a hammer and then removed. Try to hammer the ceramic in a localized area, starting from the middle and moving out.
- Vinyl tiles should be ripped up with a pry bar.
Prepare the floor
This step includes several phases:
- You need to remove the old tiles and then clean and wash the floor. Once it is dry, you need to make sure that the surface is levelled.
- You may need to sand down bumps or fill in cracks with thin-set cement. Make sure the cement is completely dry before proceeding.
- You may have to install plywood or cement board to level the floor.
Measure the floor and create a layout
You need to measure your floor and create reference lines that will help you with the pattern. If you have chosen a special layout, you need to have it on paper in front of you so that you can follow it. If you are not sure how it will turn out, it is good to spend some time dividing the floor using chalk or other material.
Use a long level to make sure the floor area is level. Marble is a very soft tile and can be particularly susceptible to cracking if it is not installed on a level surface. Therefore, use the longest level possible to make sure your floor is level.
- You can try sanding down any bumps that raise the floor or filling in any depressions in the floor surface with thin-set cement. Wait for the cement to dry before continuing completely.
- You may also need to lay a plywood subfloor to make the floor level.
- Marble should not be installed on a floor with a change in height that is more than ¼ inch (6 mm) at a distance of 10 feet (3 m).
Measure the length and width of the floor and create a layout on paper. Plan your installation on paper using the floor dimensions and sizes of the tiles. Decide on your pattern for laying the tiles. You can lay them in rows or in a pyramid-like structure, or in other patterns. Draw the pattern to scale on paper.
- You want to keep most tiles full-sized so that you do not have to cut them.
- You also do not want strips of tile that are less than 2 inches (5 cm) wide.
Mark the centre of your floor
Measure the centre of each wall and make a light mark with a pencil. Then take a chalk snap line and hold it to either end of the centres of two opposing walls. Lower the line and snap it to the floor to make a chalk line. Do this for the other two walls as well. Where the two chalk lines meet is the centre of your floor.
Install the first tile
Take the first tile and lay it on the spread mortar. Make sure that it fits the pattern you have chosen. It is good to start from the centre and work your way around. Make sure not to step on any newly laid tiles. Plan your work in such a way so that you end up at the door and not cornered in one of the room angles. You can use a rubber mallet to tap the tile to make sure that it fits evenly.
Mark the First Diagonal Tile
On a subfloor of cement backer board screwed in place, dry-fit the first tiles on the floor before getting started. Position the first tile in the corner of the room where the walls make a 90-degree angle. Lay the first tile so that one of its flat sides is toward the corner, and the tile’s corners almost touch the walls. Use a speed square and measuring tape to make sure the tile is centred and sitting at a 45-degree angle to the walls. Mark the floor along the top and bottom edges of the tile for later reference. From that first tile, layout the design across the rest of the floor and mark the floor with parallel lines so that tiles can be accurately placed.
Use tile spacer
The procedure for installing the next tiles is the same as that for the first one – spread mortar lay tile, tap it with a rubber mallet. Don’t forget to use a tile spacer to keep the consistent spacing between them. Thus, you will have good grout lines.
Apply the Thinset
Spread the thin-set on the floor using a 1/4″ x 1/4″ square-notched trowel over an area of two to three tiles up to the marked lines on the floor (Image 1). Don’t cover the lines, or it won’t be easy to keep the tiles lined up properly. Also, don’t allow the thinset to begin to dry before applying the tiles. Thinset should be sticky to the touch (Image 2). If not, it is too dry, and a new batch should be mixed.
Begin Setting Tiles
Set the first whole tile and the marks by slightly twisting it in place and pushing down hard on the tile. Fill in the corner tiles next. Use tile spacers to ensure even grout lines. After setting two or three tiles, place a straight board that spans the tiles on top and gently tap it with a mallet to ensure the faces of the tiles are all at the same height. Continue setting tiles, making sure to place the tiles along with the marks correctly. Remove any thin-set that oozes up between tiles.
Use a wet saw to cut tiles.
Most probably, you will need to cut some tiles to fit your pattern or a specific area in the room. The best tool for cutting marble tiles is the wet saw. You can either buy one if you are planning more tile work or rent it out.
Let the Thinset Cure
Allow the thin-set to cure beneath the tiles according to the manufacturer’s instructions. Do not walk on the tile until the thin-set is cured. After the thin-set has completely set, remove the tile spacers. Clean up any debris.
Mix and Apply the Grout
Mix the grout in small batches that can be applied in 20 minutes or so. Using a grout float, spread the grout over the tiles and, holding the float at an angled force the grout into the grout lines. Use the float to clean most of the grout from the face of the tiles.
Clean the Tiles
As the grout on top of the tile dries and turns powdery, it can be sponged away. Use clean water in a bucket and a sponge to clean the tiles. Replace the water frequently to keep it clean for rinsing the sponge and being careful not to disturb grouted areas. Use towels to buff away any grout film after sponging. The grout in the grout lines may not be dry at this point, so be careful not to disturb it.
Once you are ready with all the grout, make sure to wipe all the tiles clean with a slightly damp grout sponge. Be careful not to remove the grout from the grooves.
Seal the grout
The last step in the process is to seal the grout. This, however, is done after some time – can be up to seven days. Check the manufacturer’s instructions and proceed accordingly. You can also seal the marble tiles again so that they are ready to withstand the traffic longer. Follow the recommended steps provided by the grout manufacturer to cure the grout. Some types of grout require that you dampen the grout over several days so that it cures slowly.
Tips on Installing Marble Flooring
Follow these simple guidelines to install marble tile properly.
- Test the floorboards to make sure they are sturdy. If they are not, the grout between the tiles could crack.
- Check the slope on the floor. A level floor is a must for installing a marble floor.
- Reinforce the floor if needed. You can reinforce your floorboards with another layer of plywood or a cement backer board panel.
- Find the centre of the room. Check the layout of the marble tile to avoid having a tiny edge on one end of your floor. If needed, move the line away from the centre to have equal spaces on both sides. To keep a symmetrical look, have the starting tile straddle the centerline.
- Apply mortar, preferably a thin-set mortar. Place your marble tile on the mortar. Using this starting point, spread the mortar and use a trowel to notch it.
- If you apply mortar over seams in the floorboard, apply mesh tape to the seams to avoid cracking.
- After putting each marble tile on the mortar, place a 1/16-inch tile spacer between it and the next tile. This will ensure that the finished project has an evenly spaced appearance.
- When the mortar is dry, seal the marble. The marble tile should be sealed using a neutral pH breathable sealer after installation. The sealer will need to be reapplied periodically, recommended every 12 months or so.
To keep your marble floor free of stains, make sure to remove any stains as soon as possible. It is better to blot than to wipe them. Use special marble tile cleaners and not conventional cleaning products. Mild soap and dishwashing liquid are also acceptable. Clean with soft, clean mops and plenty of water. Don’t let the marble floor dry naturally but rather use a microfiber cloth to buff it and bring out its natural shine.
Be aware of any acidic liquids as they can damage and etch marble. Steer clear from ammonia-based cleaners as well. Never use any abrasives on this gentle stone. Swipe the dirt and avoid vacuum cleaners as their wheels may scratch the tiles.