
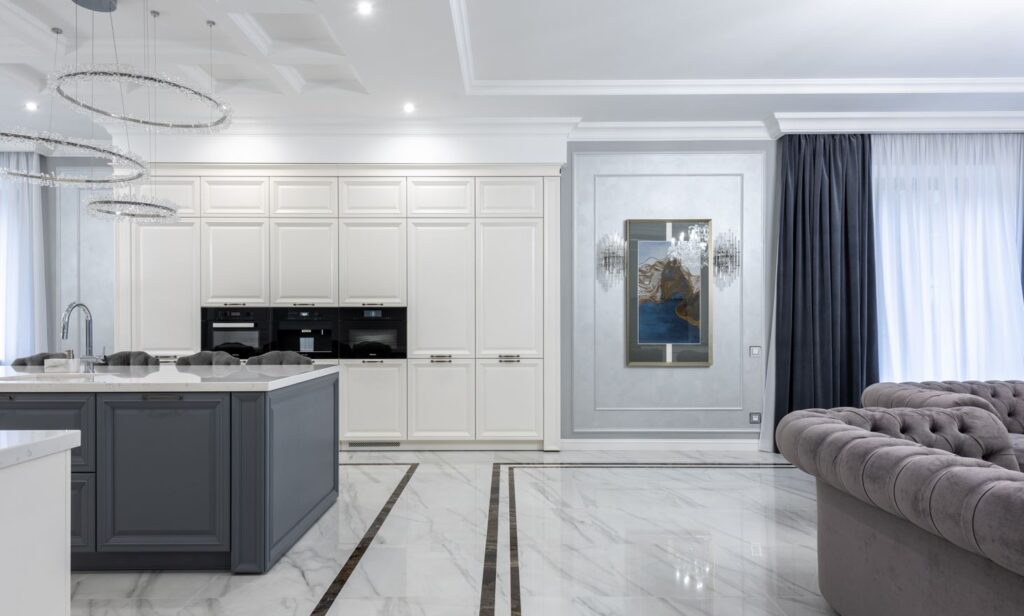
Granite countertops are gorgeous, but their size and delivery make them expensive, so you may need to buy several pieces. Due to the high cost of granite countertops, it is important to conceal any seams that may appear. Choosing the perfect epoxy shade and mixing it properly is vital to have a flawless finished seam. Granite can be seamed in a strong and barely visible way if care is taken.
Verifying and Covering the Raw Sides
Choose Slabs Of Granite With Colouring And Veining That Are Consistent.
Unlike those of artificial countertop materials, the colours and patterns of two granite slabs joined together can never be an exact match. Select granite slabs from your supplier or, more likely, cut them to size yourself, finding pieces with the closest possible colour and veining matches. In this way, the join will be much less obvious.
- Professional granite suppliers can see the optimum cuts from a granite block with their eyes and possibly use imaging software to make invisible seams. Find a reliable vendor and put your faith in their services.
Check The Dry Fit And Ensure The Edges Are Smooth And Aligned Properly.
Dry-fitting the components ensures a perfect fit before any adhesives are used. Correct any misalignment or roughness in the seams. If you are still looking for the edges and fit of your granite, don't seam it.
- Careful measurement and cutting with the right saw, blade, and ability are required to achieve smooth, straight, and perfectly aligned granite edges. Choosing a reputable provider would help because most do-it-yourselfers lack the equipment and expertise to cut granite correctly.
- Again, it is recommended that you have your supplier smooth off any uneven or rough edges.
Use A Little Damp Cloth To Clean The Granite Edges.
Here, have a clean, lint-free cloth at the ready and give it a quick rinse in some water. To clean up here, all you need is some fresh water. The granite pieces and the areas around them, including the tops and bottoms, should be wiped down. Hang them up to dry first.
- The first step in preparing the surface for epoxy is to clean it thoroughly.
Seam The Two Pieces Together By Tapping Them Along Their Edges With Masking Tape.
Place the tape strips along the tops of the granite pieces on the two joining sides. This minimal effort will greatly facilitate clean-up in the future.
- Some epoxies say you won't need tape because they won't stick to polished stone. Even so, using tape wherever possible when seaming granite is best.
Clamping and Seam Alignment
Place The Two Slabs Of Granite Side By Side.
Align the two edges you will be seaming together, leaving about an inch or two (2.5-5.1 cm) between them. This will allow you to squeeze the parts together fast while still giving you room to apply the 2-part epoxy to the edges.
- You can double-check the fit of the two halves in this final step.
Put Turnbuckles Through The Suction Cups In Two Or Three Places.
Purchase a kit that is designed for gripping countertop seams. This set must feature metal turnbuckles, which look like long bolts, and rubber suction cups. Turn the top turnbuckle counterclockwise to thread it through the holes in each set of suction cups. To avoid getting in your way while working, place the suction cups on the turnbuckle at a distance of roughly 4 to 6 inches (10 to 15 centimetres).
- Two sets of suction cups and two sets of turnbuckles should be sufficient for sealing most countertop joints; however, longer joints may require three or more sets each.
- Another option is to purchase or rent a vacuum pump-powered device called a "seam puller" or "seam setter" to help you pull and secure the granite pieces together. If you choose to use one of them, do it as intended.
Each Set Of Suction Cups Should Be Affixed To The Granite Seam.
Think of 2 or 3 turnbuckles as bridge spans and suction cups as bridge piers across the seam. Each suction cup should be around 2 to 3 inches (5.1 to 7.6 centimetres) from the seam.
- The suction cups must be properly attached to the granite. If necessary, run a damp fingertip around the bottom of each cup.
- After the 2-part epoxy has been applied to the joint, the granite slabs will be drawn together using turnbuckles.
Epoxy-Mixing and -Application
You Can Adjust The Shade Of A 2-Component, Clear Epoxy To Suit Your Granite By Adding A Tint.
On a piece of cardboard, place a golf ball-sized blob of transparent epoxy glue (designed for stone applications). Then, close by the glob of epoxy glue, drop a tiny glob of the tint colour you've chosen. Using a putty knife, transfer a little amount of the tint to the epoxy resin, then thoroughly mix the two until you achieve the desired hue.
- You can also make many small batches of coloured epoxy to experiment with different colour schemes. Mix various tint colours or blend lighter and darker tints of the same hue. After 15–20 minutes, evaluate how well the coloured epoxy has adhered.
Thoroughly Incorporate The Hardener Into The Tinted Epoxy Resin.
To find out how much hardener to resin your 2-part stone epoxy needs, consult the package directions. Wait to combine the hardener and resin until it is time to affix the granite pieces.
- Using a small putty knife, thoroughly combine the hardener with the resin.
- You can only use 2-part epoxies as adhesives once you mix them, but they harden quite quickly once you do. The working time for the combined epoxy is approximately 10 minutes.
Apply Your Activated Epoxy To The Granite's Edges Like Butter.
The viscosity of the mixed epoxy will be like peanut butter, which may be applied to the two adjacent sides of the granite similarly. Use a small putty knife to apply epoxy in uniform layers along both facing edges.
- Make sure there are no air bubbles along the mating surfaces by applying a generous amount of epoxy. You don't need to use a lot of epoxy because any surplus will be removed when the parts are brought together.
Seam Clamping and Cleaning
Put Some Pressure On The Turnbuckles To Join The Granite Slabs.
Turn the ends of the turnbuckles clockwise to tighten them by hand. If you try to tighten the suction cups with a wrench, for example, you can end up ripping them off the granite. Turning the turnbuckles, the suction cups are drawn closer together, and the granite slabs are pulled together.
- To get the best results from your "seam puller" or "seam setter," use it as directed.
- When joining two granite slabs, ensure they are perfectly parallel and level. You can do fine tunings by hand or with a rubber mallet.
Apply Water To A Razor Blade Or Putty Knife And Scrape Off The Surplus Epoxy.
Run the blade or knife across the overlapped tape and the closed seam. Doing so will eliminate the excess epoxy forced out of the joint.
- It's unnecessary to get rid of all the excess epoxy at once, but doing so while it's still wet will simplify clean-up.
After 15 To 20 Minutes, Remove The Tape And Suction Cups So The Surface May Dry.
Generally, epoxies' curing time is 15–20 minutes, but always check the manufacturer's instructions. Once that time has passed, you can remove the tape and suction cups.
- On a hot and sticky day, you may need to give your epoxies more time to dry than usual.
Use A Razor To Remove Any Remaining Dried Epoxy.
Once the tape has been removed, any excess epoxy can be scraped off with a clean, sharp razor. Please do your best, but don't sweat the small stuff when working with granite; it's a tough material.
- The dried epoxy can be easily scraped off using a razor blade. Avoid using a previously used, dull blade.
Finally, Polish The Counter With A Damp Cloth.
After you've used the razor to get a close shave along the granite seam, it's time to clean up. Use an acetone-soaked towel to wipe the seam down and remove any dried epoxy that may have been left behind.
- Once the acetone has dried, use a granite polish by spraying it on and buffing it as directed.
FAQs About Masonry
Use a straightedge to align the two pieces precisely. The seam should be tight, with no gaps between the pieces.
A seam setter tool applies pressure to hold the granite pieces tightly together while the epoxy adhesive cures. This ensures a flush and tight seam.
While a perfectly hidden seam is the goal, having a very fine line at the seam is common. Skilled installation and matching the epoxy colour to the granite can help minimise its visibility.
The curing time varies based on the epoxy type and environmental conditions. It can range from a few hours to overnight. Follow the manufacturer's recommendations.
Seaming granite requires precision, experience, and specialised tools. For a seamless result, it's advisable to have professional stone fabricators or installers handle this task.
Where Should a Seam Be Located in a Granite Countertop?
A seam should be placed where people will be least likely to notice it. Find places where pauses are inevitable, such as near the kitchen's appliances. Seams should be located at regions that provide support, such as the intersection of two cabinet walls.
Is there a Seam in Every Granite Countertop?
Countertops made of granite don't necessarily lack seams. A single granite slab might be sufficient for a modestly sized countertop installation. But seams can be necessary if you need to cover a greater area.
There must be a link between the two corner sections of the countertop so that the countertop may be installed. In certain cases, you can use just one slab for a smaller countertop and forego the seams completely because the slabs are so large.
How to Hide Granite Seams?
It can be challenging to conceal granite seams, especially if the seam is in a highly visible location, such as the centre of a very long countertop. Be careful when filling the seams to avoid having them stand out like a sore thumb.
Choose granite slabs that are quite similar to one another; this will assist in concealing the seam where the slabs were cut.
Additionally, pick the epoxy hues with care. Blend the pigments together to achieve the closest possible match with the slabs. As a result, the joint between the two slabs may need to be more obvious. Choose slabs with dark hues and complex patterns to minimize the visual impact of joints.
You'll have a great chance of concealing the seams if you take precise measurements, carefully select the slabs, and work with experienced fabricators. This will aid in giving the impression of a continuous granite surface.
Conclusion
Granite countertops are a beautiful and expensive material, but they can be difficult to install due to their size and delivery. To ensure a flawless finish, it is essential to choose the right epoxy shade and mix it properly. Granite can be seamed in a strong and barely visible way if care is taken.
To ensure a smooth seam, choose slabs of granite with consistent coloring and veining. Professional granite suppliers can help you find the optimum cuts from a granite block and use imaging software to make invisible seams. It is recommended to have your supplier smooth off any uneven or rough edges.
To clean the granite edges, use a damp cloth and rinse it with water. The granite pieces and surrounding areas should be wiped down and dried before applying the epoxy.
Seam the two pieces together by tapping them along their edges with masking tape. This minimizes effort and facilitates clean-up in the future. Some epoxies may not stick to polished stone, but using tape wherever possible when seaming granite is best.
Place the two granite slabs side by side, aligning them with an inch or two between them. Double-check the fit of the two halves in this final step.
Put turnbuckles through the suction cups in two or three places. Purchase a gripping countertop seam kit that features metal turnbuckles and rubber suction cups. Thread the top turnbuckle counterclockwise to thread it through the holes in each set of suction cups. Two sets of suction cups and two sets of turnbuckles should be sufficient for most countertop joints, but longer joints may require more sets each.
Another option is to purchase or rent a vacuum pump-powered device called a "seam puller" or "seam setter" to help you pull and secure the granite pieces together. Each set of suction cups should be properly attached to the granite seam, with 2 or 3 turnbuckles acting as bridge spans and suction cups as bridge piers across the seam. After applying the 2-part epoxy to the joint, the granite slabs will be drawn together using turnbuckles.
Seams should be placed where people will be least likely to notice it, such as near the kitchen's appliances or at regions that provide support, such as the intersection of two cabinet walls.
Seams can be necessary for granite countertops, but not all countertops have seams. A single granite slab might be sufficient for a modestly sized countertop installation, but seams can be necessary if needed to cover a greater area. There must be a link between the two corner sections of the countertop so the countertop can be installed.
To hide granite seams, choose granite slabs that are quite similar to one another and blend the pigments together to achieve the closest possible match with the slabs. Choose slabs with dark hues and complex patterns to minimize the visual impact of joints.
Consider taking precise measurements, carefully selecting the slabs, and working with experienced fabricators to give the impression of a continuous granite surface.
Content Summary:
- Due to the high cost of granite countertops, it is important to conceal any seams that may appear.
- Select granite slabs from your supplier or, more likely, cut them to size yourself, finding pieces with the closest possible colour and veining matches.
- Correct any misalignment or roughness in the seams.
- If you are still looking for the edges and fit of your granite, don't seam it.
- The granite pieces and the areas around them, including the tops and bottoms, should be wiped down.
- Align the two edges you will be seaming together, leaving about an inch or two (2.5-5.1 cm) between them.
- This will allow you to squeeze the parts together fast while still giving you room to apply the 2-part epoxy to the edges.
- Purchase a kit that is designed for gripping countertop seams.
- Turn the top turnbuckle counterclockwise to thread it through the holes in each set of suction cups.
- Think of 2 or 3 turnbuckles as bridge spans and suction cups as bridge piers across the seam.
- The suction cups must be properly attached to the granite.
- After the 2-part epoxy has been applied to the joint, the granite slabs will be drawn together using turnbuckles.
- To find out how much hardener to resin your 2-part stone epoxy needs, consult the package directions.
- Wait to combine the hardener and resin until it is time to affix the granite pieces.
- Using a small putty knife, thoroughly combine the hardener with the resin.
- Turning the turnbuckles, the suction cups are drawn closer together, and the granite slabs are pulled together.
- When joining two granite slabs, ensure they are perfectly parallel and level.
- After 15 To 20 Minutes, Remove The Tape And Suction Cups So The Surface May Dry.
- Generally, epoxies' curing time is 15–20 minutes, but always check the manufacturer's instructions.
- Once that time has passed, you can remove the tape and suction cups.
- On a hot and sticky day, you may need to give your epoxies more time to dry than usual.
- Once the tape has been removed, any excess epoxy can be scraped off with a clean, sharp razor.
- The dried epoxy can be easily scraped off using a razor blade.
- After you've used the razor to get a close shave along the granite seam, it's time to clean up.
- Use an acetone-soaked towel to wipe the seam down and remove any dried epoxy that may have been left behind.
- Countertops made of granite don't necessarily lack seams.
- A single granite slab might be sufficient for a modestly sized countertop installation.
- But seams can be necessary if you need to cover a greater area.
- There must be a link between the two corner sections of the countertop so that the countertop may be installed.
- In certain cases, you can use just one slab for a smaller countertop and forego the seams completely because the slabs are so large.
- It can be challenging to conceal granite seams, especially if the seam is in a highly visible location, such as the centre of a very long countertop.
- Be careful when filling the seams to avoid having them stand out like a sore thumb.
- Choose granite slabs that are quite similar to one another; this will assist in concealing the seam where the slabs were cut.
- Additionally, pick the epoxy hues with care.
- Blend the pigments together to achieve the closest possible match with the slabs.
- Choose slabs with dark hues and complex patterns to minimize the visual impact of joints.
- You'll have a great chance of concealing the seams if you take precise measurements, carefully select the slabs, and work with experienced fabricators.
- This will aid in giving the impression of a continuous granite surface.